

Prerequisites #
- Codex CLI installed —
npm install -g @openai/codex - A WoAiToken account with credits — new.woaitoken.com
- Your NewAPI API key (get it in Step 1)
Step 1 — Get Your API Key #
1. Open the console
Visit new.woaitoken.com/dashboard/overview and sign in.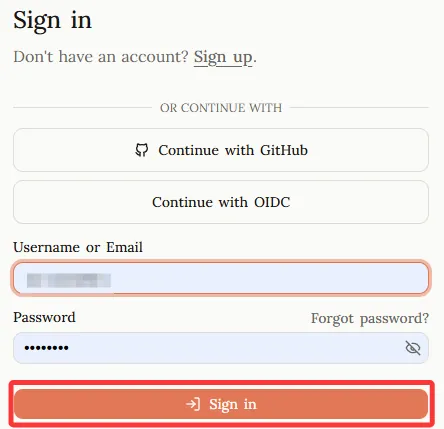
2. Create a token
Go to API Keys → Add Token. Give it a name (e.g. “Claude Code”), set no expiration, then click Submit.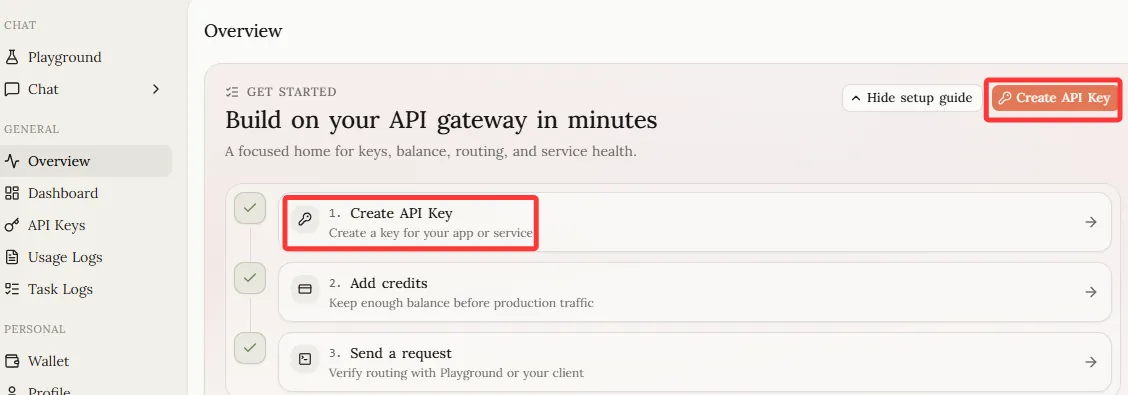
3. Copy the key
Copy the generated key — it starts with sk-..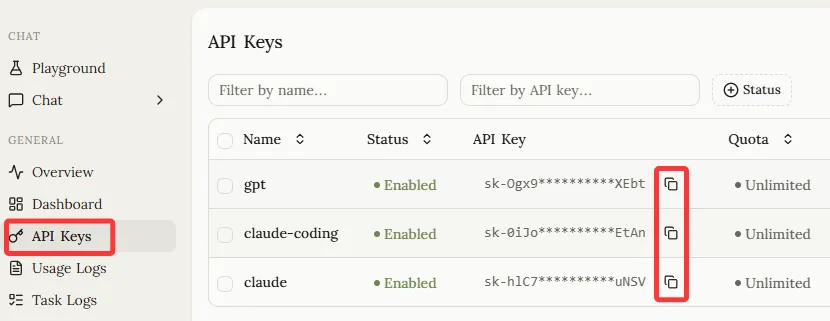
Step 2 — Configure Codex CLI #
NewAPI provides a fully OpenAI-compatible endpoint at https://new.woaitoken.com/v1.
Choose one of the following methods:
Method A — Environment Variables (Recommended) #
macOS / Linux — add to ~/.zshrc or ~/.bashrc:
export OPENAI_API_KEY="sk-your-key-here"
export OPENAI_BASE_URL="https://new.woaitoken.com/v1"
Then reload:
source ~/.zshrcWindows PowerShell:
[Environment]::SetEnvironmentVariable("OPENAI_API_KEY","sk-your-key-here","User")
[Environment]::SetEnvironmentVariable("OPENAI_BASE_URL","https://new.woaitoken.com/v1","User")
⚠️ Open a new terminal window after running for changes to take effect.
Method B — Config File #
Create or edit ~/.codex/config.toml:
model = "gpt-5.5"
provider = "openai"

[providers.openai]
base_url = "https://new.woaitoken.com/v1"
Then set your API key via environment variable:
export OPENAI_API_KEY="sk-your-key-here"Method C — One-time Session (Testing Only) #
OPENAI_API_KEY="sk-your-key-here" \
OPENAI_BASE_URL="https://new.woaitoken.com/v1" \
codex
⚠️ Only active for the current terminal session. Use Method A or B for permanent setup.
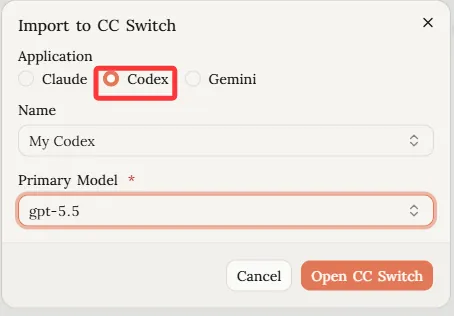
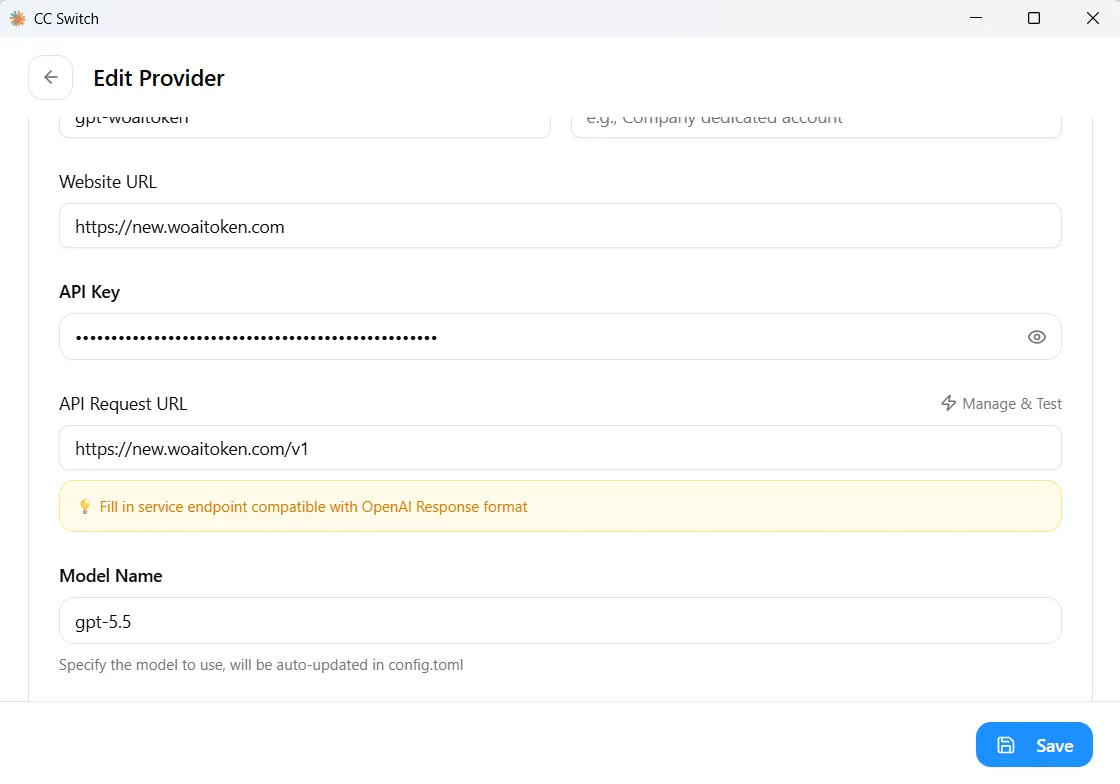
Method D — CC Switch (GUI, Multi-provider) #
CC Switch is a desktop app that manages multiple AI API configurations through a GUI — no manual JSON editing needed. Ideal if you switch between multiple API services.
Install
Download from ccswitch.io, or on macOS via Homebrew:
brew tap farion1231/ccswitch && brew install --cask cc-switchConfigure
Go to new.woaitoken.com/keys → click API Keys → choose CC Switch: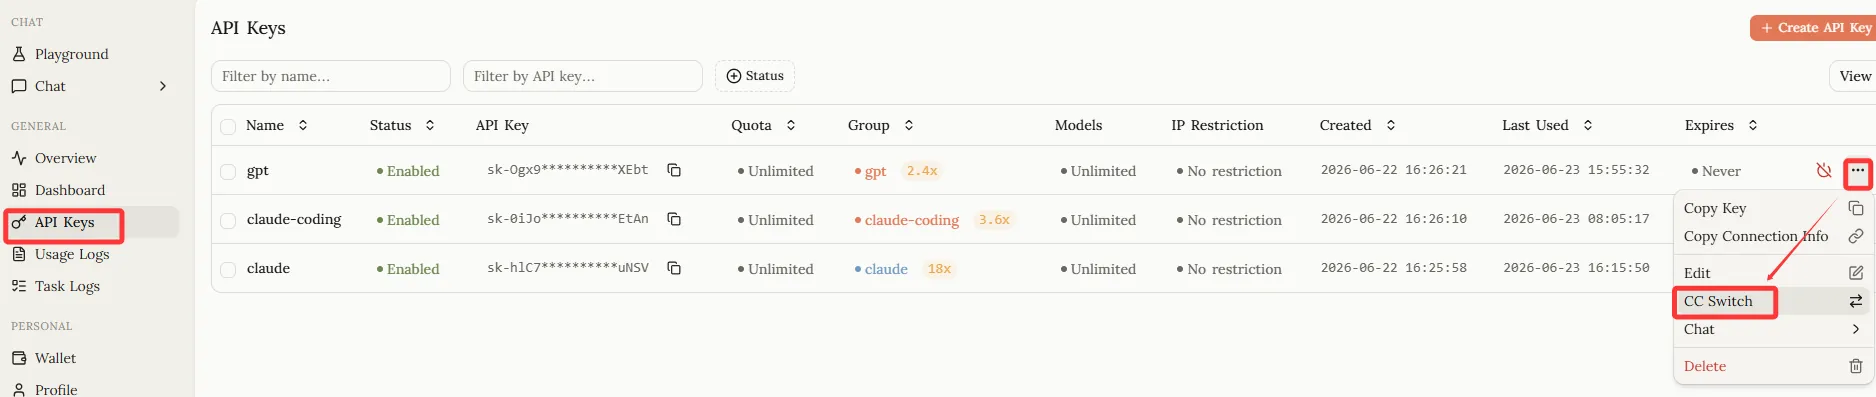
Test Configuration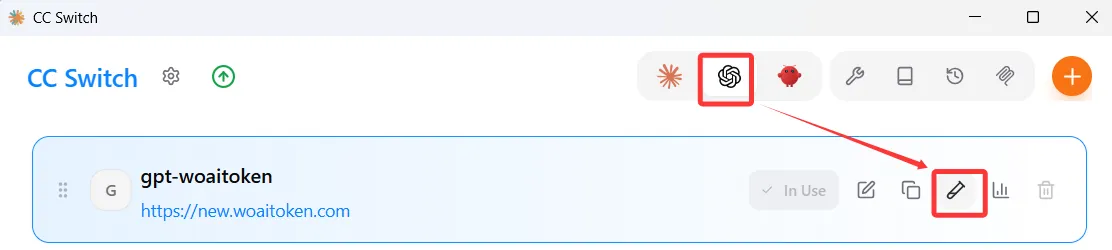
Step 3 — Verify #
Open Codex and send a test message to confirm the connection works.
If Codex replies, you’re all set ✅.
Troubleshooting #
| Issue | Solution |
|---|---|
| 401 Unauthorized | Check your API key is complete (including the sk- prefix) with no extra spaces |
| Model not found | Check available models at new.woaitoken.com/dashboard/overview → Models |
| Connection refused | Confirm OPENAI_BASE_URL is https://new.woaitoken.com/v1 — the /v1 suffix is required |
| 429 Too Many Requests | Your credits are used up. Top up at woaitoken.com |


